4. Initialisation and general function
There are two ways of uploading a project in ParkOptimizer:
- Specify the WindSim directory by selecting the WindSim project file (.ws) in the Source Data panel. A check that the required Input Files are present is performed, followed by loading of the Area Map (the terrain inclination generated in WindSim,
windsim_project_directory\dtm\view_inclination.scl). - Load an existing ParkOptimizer project from File → Load Session, which loads a previously saved ParkOptimizer .mat file.
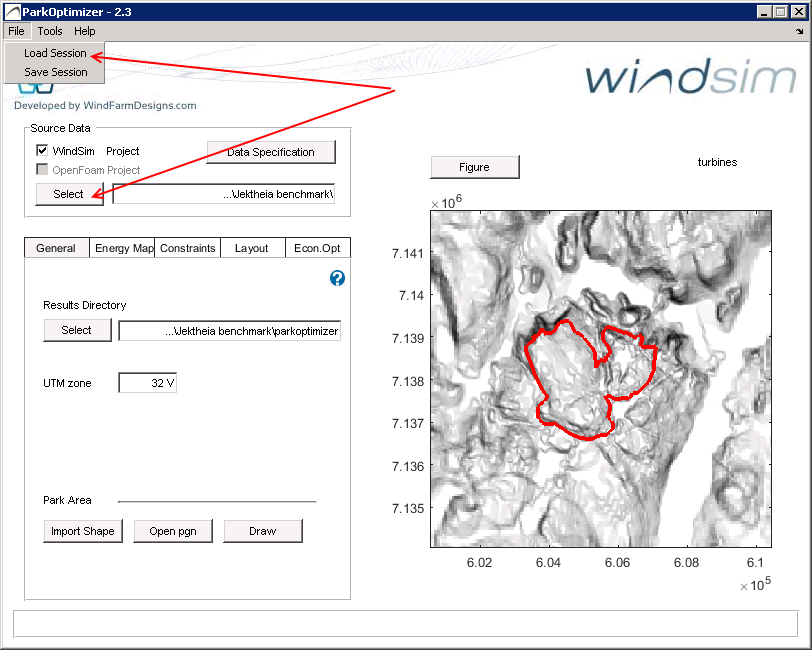
The Results Directory is where the ParkDesign files are placed. After selecting the WindSim Source Data, it is set to windsim_project_directory\parkdesign. The UTM zone input is used for writing the Google Earth energymap_ge.kml and windmap_ge.kml files. Access to the user documentation is available under Help → Online Documentation, as well as the question-mark icon.
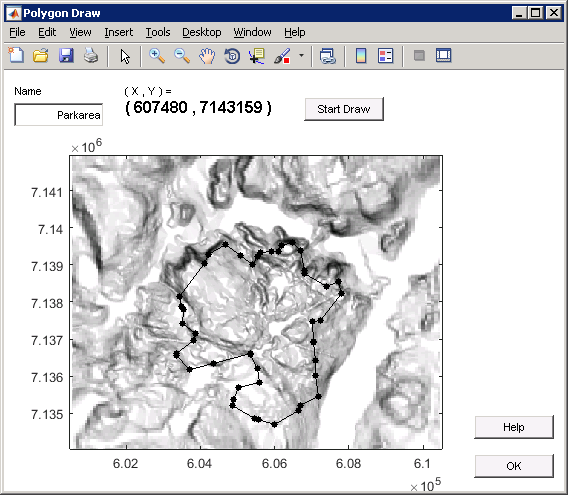
The Park Area should be defined by:
- loading a shape (.shp) file, or
- uploading a polygon (.pgn) of
x, ycoordinate pairs.
The Draw button opens a drawing program; the file is saved to the Results Directory.